
Table of Contents
Why Monitor Calibration Matters More Than You Think
Every monitor leaves the factory with a calibration profile, but that profile is optimized to look impressive under retail lighting conditions — bright, punchy, and heavily saturated. It is almost never accurate for real-world use. The monitor you are reading this on right now is very likely displaying colors that are off by a measurable, visible margin.
For most users, this matters in ways that are easy to dismiss but difficult to ignore once you know about them. Photos you edit look different on every other screen. Whites look warm or cool depending on your ambient lighting. Dark detail in games and films gets crushed into a flat black mass or lifted into an unrealistic gray haze.
Who Needs Monitor Calibration
Definitely Calibrate If You:
- Edit photos or video professionally
- Print images and want screen/print matching
- Do graphic design or illustration work
- Notice colors looking wrong on your display
Worth Calibrating If You:
- Game competitively (better shadow detail)
- Use your monitor for many hours per day
- Have a new or recently replaced monitor
- Share media that others will view on different screens
Calibration does not require a colorimeter. The built-in tools in Windows and macOS provide meaningful improvement for free, in under 10 minutes. Hardware calibration takes this further to professional accuracy. This guide covers both approaches in full.
Before You Calibrate: Essential Preparation
Calibration accuracy depends heavily on conditions. Skipping this preparation section is the most common reason calibration results disappoint.
Pre-Calibration Checklist
Warm up the monitor for 30 minutes
Backlights — especially cold-cathode fluorescent lamps in older monitors — drift significantly in color temperature until they reach operating temperature. LEDs are more stable but still benefit from a 30-minute warm-up.
Set your ambient lighting to normal working conditions
Calibrate under the same lighting you normally work in. Calibrating in a bright room and then working in darkness — or vice versa — makes the calibration less useful. Close blinds if direct sunlight hits your screen.
Reset the monitor to factory defaults
In your monitor's OSD (on-screen display), find the Reset or Factory Reset option. Starting from a clean baseline ensures your calibration is building on manufacturer defaults, not accumulated adjustments.
Select the correct preset in your monitor's OSD
Use "sRGB" mode for general use and photo editing, "DCI-P3" mode for video production on a wide-gamut monitor, or "Custom" mode if you plan to adjust RGB gains manually.
Set native resolution and 60Hz+ refresh rate
Calibrate at the resolution and refresh rate you actually use. Scaling and refresh rate changes can affect how the OS applies color profiles.
Target Calibration Values: What the Numbers Mean
Every calibration process — whether in Windows, macOS, or a professional tool — will ask you to set target values. Understanding what these numbers represent prevents the common mistake of calibrating to arbitrary "better looking" settings instead of accurate ones.
| Setting | Recommended Value | What It Controls |
|---|---|---|
| White Point (Color Temperature) | D65 (6500K) | The color of "white" — how warm or cool it appears |
| Gamma | 2.2 (sRGB standard) | How mid-tones are rendered between black and white |
| Brightness (Luminance) | 80-120 cd/m2 | Peak brightness — match to your ambient light level |
| Black Point | 0.1-0.5 cd/m2 | Minimum luminance — how dark blacks appear |
| Color Space | sRGB for general use, DCI-P3 for video | The range of colors the monitor can display |
The Most Common Mistake: Brightness Too High
Most monitors ship set to 250+ cd/m2. Accurate color evaluation requires 80-120 cd/m2 in a typical indoor environment. If your monitor looks very dim after calibration, your ambient light is the problem — not the calibration. A well-calibrated display in a properly lit room is more comfortable on the eyes and reveals accurate color gradients that overbrightened displays blow out.

Windows Monitor Calibration: Step-by-Step
Windows includes a built-in Display Color Calibration wizard that guides you through gamma, brightness, contrast, and color balance adjustments. It produces a usable ICC profile without any additional software. This method is free, takes about 10 minutes, and produces visible improvement on most monitors.
Opening Windows Color Calibration
- Press Win + R, type
dccw, and press Enter. This opens Display Color Calibration directly. - Alternatively: Settings > System > Display > Advanced display settings > Display adapter properties > Color Management tab > Calibrate Display.
- The wizard opens. Click Next to proceed through each step.
Step 1: Gamma Adjustment
Windows shows you a gamma reference image and asks you to adjust a slider until the center dots on a test pattern nearly disappear into the surrounding pattern. The target is gamma 2.2. Common mistakes:
- Setting gamma too high (dark) — shadows are crushed, shadow detail disappears
- Setting gamma too low (bright) — images look washed out and flat
- The "nearly disappear" instruction is accurate — the dots should not completely vanish
Step 2: Brightness and Contrast
The wizard prompts you to adjust brightness and contrast using your monitor's physical OSD buttons — not software controls. This is important: hardware adjustments are more accurate than software brightness changes.
- Brightness: You should just barely be able to see the X symbol in the dark shirt image. If it disappears entirely, brightness is too low. If it is clearly visible, brightness is too high.
- Contrast: Adjust until you can see distinct creases in the bright shirt image without the white areas bleeding together.
Step 3: Color Balance
The color balance step uses RGB sliders to neutralize any color cast in your grays. Move the sliders until the gray bar looks as neutral (neither warm nor cool, neither magenta nor green) as possible. This is where most monitors benefit significantly — factory presets frequently skew warm or green.
Saving the Profile
At the end of the wizard, click "Finish" to save the profile. Use the "Previous calibration" / "Current calibration" toggle in the final screen to compare before and after. If the current calibration looks better, confirm it. The profile is saved and applied automatically.
Also Enable ClearType
After calibrating, search for "Adjust ClearType text" and complete the wizard. ClearType subpixel rendering optimization works in combination with your color profile to improve text sharpness and readability.
Mac Monitor Calibration: Step-by-Step
macOS includes the Display Calibrator Assistant, a guided workflow that creates a ColorSync profile for your display. The process is similar to Windows but adapted to Apple's color management architecture, which is more tightly integrated with the OS.
Opening Display Calibrator Assistant
- Go to System Settings > Displays.
- Click Color profile dropdown and select Customize.
- In the Color Profile sheet, click the + button to create a new profile.
- This opens the Display Calibrator Assistant.
Expert Mode for Better Results
On older macOS versions, check "Expert Mode" if visible. Expert mode provides additional native gamma measurements that produce a more accurate profile. On macOS Ventura and later, the assistant automatically uses its full measurement set.
Working Through the Steps
- Native Gamma Measurements: The assistant shows a pattern of two overlapping circles. Adjust the slider until the inner circle matches the outer ring as closely as possible. Repeat for each step (typically 5 steps).
- Target Gamma: Select 2.2 (the standard). Only use 1.8 if you are specifically working in a print environment that requires it.
- Target White Point: Select D65 (6500K) for general use. For print work in a warm-lit studio, D50 (5000K) may be more appropriate.
- Name and Save: Give your profile a descriptive name (e.g., "Dell U2723D Calibrated April 2026") and save it.
Apple Silicon Macs: Additional Settings
On M-series Macs, disable True Tone before calibrating an external display (System Settings > Displays > uncheck True Tone). True Tone dynamically adjusts color temperature based on ambient light — excellent for everyday use, but it interferes with accurate calibration measurements. Re-enable it after calibration if desired.
DisplayCAL: The Best Free Calibration Software
DisplayCAL is a free, open-source monitor calibration application built on ArgyllCMS — the same color science engine used by professional calibration workflows. When paired with a hardware colorimeter, DisplayCAL produces ICC profiles that exceed the quality of most commercial calibration software. It also works in a basic mode without a colorimeter for software-only calibration.
Getting Started with DisplayCAL
- Download DisplayCAL from displaycal.net (free, Windows/Mac/Linux).
- Install ArgyllCMS when prompted — DisplayCAL uses it as its measurement engine.
- If using a colorimeter, plug it in before launching DisplayCAL. Most Datacolor Spyder and X-Rite devices are automatically detected.
- Select your display from the dropdown menu.
DisplayCAL Settings for Common Use Cases
| Use Case | White Point | Gamma | Brightness Target |
|---|---|---|---|
| General Use | D65 | 2.2 | 100-120 cd/m2 |
| Photo Editing | D65 | 2.2 | 80-100 cd/m2 |
| Print Matching | D50 | 2.2 | 120 cd/m2 |
| Video Production | D65 | 2.4 (Rec.709) | 100-200 cd/m2 |
| Gaming | D65 | 2.2 | 120-200 cd/m2 |
Running the Calibration
- Click Calibrate & Profile in DisplayCAL's main window.
- Follow the on-screen instructions to position your colorimeter flush against the screen.
- The process takes 5-30 minutes depending on the number of measurement patches selected. The "Default" patch set (about 150 patches) is sufficient for most users.
- When complete, DisplayCAL installs the ICC profile automatically and offers to set it as the system default.
- Verify the result using the built-in Profile Inspector to check average Delta-E values. Under 1.0 is excellent; under 3.0 is acceptable.
Test Your Calibration After
Use our free color accuracy test to verify your calibration produced accurate results across the visible spectrum.
Color Accuracy TestHardware Colorimeters: When You Need Professional Accuracy
A hardware colorimeter is a small sensor device that attaches to your monitor and measures actual light output — not just the signal sent to the display. Software-only calibration relies on your eyes to adjust sliders, which is inherently imprecise. Hardware measurement eliminates human error entirely and produces objectively measurable accuracy.
If you photograph clients, produce video for broadcast, prepare files for professional print, or work in any environment where color consistency matters commercially, a colorimeter is not optional — it is a professional tool that pays for itself quickly.
Recommended Hardware Colorimeters
These are the industry-standard options at each price tier, as used by professional colorists and photographers.


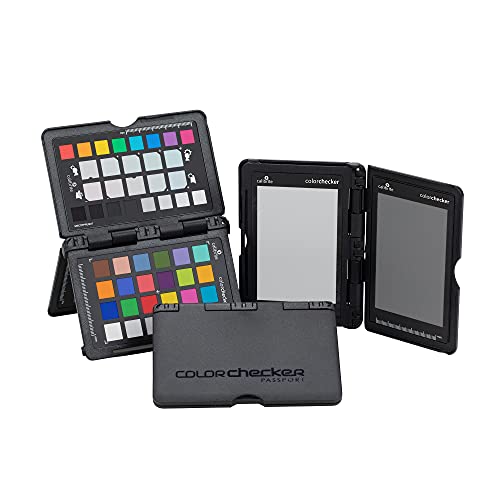
Calibrite ColorChecker Passport Photo 2
$119.00
Best for: Camera color calibration companion
View on AmazonAs an Amazon Associate, we earn from qualifying purchases. Prices are approximate.
Datacolor SpyderX Pro: The Best Value Professional Colorimeter
The SpyderX Pro is the colorimeter most photographers and content creators should buy first. At around $250, it represents the best balance of measurement accuracy, ease of use, and software capability available. Datacolor's accompanying software walks you through the calibration process with clear instructions, and the SpyderX's lens-based optical design provides faster, more accurate readings than older filter-based designs.
SpyderX Pro Key Features
- Ambient light monitoring: The Pro version includes ambient light measurement, which adjusts your brightness target based on your current environment.
- Room Lighting Condition report: Tells you whether your working environment is suitable for color-critical work — most home offices are not.
- Full profile creation: Creates ICC profiles for sRGB, Adobe RGB, and DCI-P3 color spaces.
- Multi-display support: Calibrate every monitor in a multi-monitor setup to match each other.
- Before/After comparison tool: Software shows you exactly how much calibration changed your display.
Calibrite Display Pro HL: Professional Reference Accuracy
The Calibrite Display Pro HL steps above the SpyderX Pro in measurement accuracy and is the standard in broadcast, advertising, and high-end print workflows. Calibrite carries forward the X-Rite color measurement heritage, longer than any other company in this space, producing the instruments used to calibrate the instruments used to calibrate monitors in critical production environments.
The Display Pro HL is particularly strong for wide-gamut and high-luminance displays (P3, Adobe RGB) where cheaper colorimeters introduce measurement errors at the gamut extremes. If you work with a DCI-P3 display for video, or an Adobe RGB monitor for print, the Display Pro HL's greater spectral sensitivity at these extremes produces measurably more accurate profiles.
When to Choose Calibrite Display Pro HL Over SpyderX Pro
- You work with wide-gamut monitors (Adobe RGB or DCI-P3)
- You prepare files for broadcast or film distribution
- You have multiple monitors that must match each other precisely
- Delta-E under 1.0 is a professional requirement, not just a preference
- You use DisplayCAL with full spectral correction enabled
Monitor Calibration for Gaming
Gaming calibration prioritizes three things that photo editing does not: shadow detail (seeing enemies in dark areas), bright highlight detail (not losing targets in bright environments), and motion clarity. Pure colorimetric accuracy is secondary.
Recommended Gaming Calibration Settings
OSD Settings
- Brightness: 120-200 cd/m2 (match to your room)
- Contrast: 70-80 (avoid clipping highlights)
- Color Temperature: 6500K (D65)
- Picture Mode: Game or Custom (not "Vivid" or "Movie")
- Black Level: Normal (not "Low" — this crushes shadow detail)
- Response Time: Fast or Faster (based on ghosting test)
Windows/Driver Settings
- Digital Vibrance (NVIDIA): 60-70% (not maximum — oversaturates)
- Gamma: 2.2 in display settings
- Output range: Full (0-255), not Limited (16-235)
- HDR: Enable if the game supports it and your monitor meets 400+ nit peak brightness
The "Limited vs. Full" Output Range Issue
Connecting a PC monitor via HDMI often defaults to "Limited" output range (16-235), which is the broadcast TV standard. This crushes both blacks and whites and reduces contrast significantly. Set your GPU's HDMI output to "Full" range in the NVIDIA Control Panel or AMD Radeon Settings. This single change can make a larger visual difference than any calibration adjustment.
For competitive FPS games specifically, higher gamma (2.0-2.1) can slightly open up shadow detail at the cost of overall image accuracy. This is a deliberate trade-off and not appropriate for creative work on the same monitor.
Monitor Calibration for Photo Editing
Photo editing demands strict adherence to color management standards. An uncalibrated monitor for photo editing means you are making tonal and color decisions based on inaccurate information — prints will not match your screen, and images will look different on every other display.
Target Settings for Photo Editing
- White Point: D65 (6500K). This is the industry standard for digital photography. D50 (5000K) is used for print matching in professional print workflows where viewing booths are lit at 5000K.
- Gamma: 2.2. This is the sRGB standard that matches how the majority of devices and applications handle images.
- Brightness: 80-100 cd/m2. Lower than gaming. High brightness causes you to underexpose photos and reduce saturation to compensate — which look wrong on every other display.
- Color space: sRGB for web delivery, Adobe RGB if printing to wide-gamut printers. Adobe RGB is only meaningful if your entire workflow (monitor, software, printer) is wide-gamut aware.
Essential: Use Color-Managed Applications
Calibration only works in applications that are color-managed — meaning they read your ICC profile and apply it to their color rendering. Adobe Lightroom, Photoshop, and Capture One are fully color-managed. Web browsers (Chrome, Safari, Firefox) are color-managed for embedded profiles. Windows Photos app has limited color management. Always check your application's color management settings.
Monitor Calibration for Video Production
Video calibration follows different standards than photography because the broadcast and streaming world has its own color specifications. Getting this wrong means your color grades look accurate on your monitor but wrong everywhere else.
Rec.709 (Standard Dynamic Range Video)
- Color space: Rec.709 (equivalent to sRGB for SDR content)
- White point: D65 (6500K)
- Gamma: 2.4 (slightly different from sRGB's 2.2 — this is the broadcast standard)
- Brightness: 100 cd/m2 (the reference level for SDR broadcast monitoring)
- Black level: Set so that a 0% signal reads as close to true black as your monitor allows
HDR Video (PQ / HLG)
- For consumer viewing evaluation: Enable Windows HDR or macOS HDR with your monitor's HDR mode. Standard calibration profiles do not apply in HDR mode.
- For professional HDR grading: Requires a dedicated HDR reference monitor (Sony BVM-HX310, ASUS ProArt HDR, etc.) with hardware-measured peak luminance and specialized calibration hardware (Klein K10-A, Colorimetry Research CR-100).
- Consumer colorimeters (SpyderX, i1Display) are not suitable for HDR grading calibration — they cannot accurately measure high peak luminance levels.
ICC Profiles Explained
An ICC profile is a file that describes how your specific monitor reproduces color — its color gamut, white point, gamma curve, and any characterization data generated during measurement. Color-managed applications read this profile and use it to map colors correctly from the image's embedded color space to what your monitor can actually display.
The Three Types of ICC Profiles You Will Encounter
1. Factory/Generic Profiles
Supplied by the monitor manufacturer. Represent the average characteristics of that model, not your specific unit. Better than no profile, but not accurate to your particular display.
2. Software Calibration Profiles
Generated by the Windows or macOS calibration wizards. Correct the gamma and white point based on visual adjustments. More accurate than factory profiles, especially for fixing color temperature. Accuracy limited by human eye precision.
3. Hardware Measurement Profiles
Generated by a colorimeter measuring actual light output. Include a full characterization of the display's color behavior across hundreds or thousands of measurement patches. The most accurate profiles available outside of laboratory-grade spectrophotometers.
How to Check Your Active ICC Profile
Windows
- Search for "Color Management" in the Start menu.
- Select your display in the dropdown.
- The active profile shows at the top of the list.
- To change: select a different profile, click "Set as Default Profile."
macOS
- Go to System Settings > Displays.
- Click the Color Profile dropdown.
- All available profiles for your display appear.
- Click "Open Profile" to inspect any profile's data.
How Often Should You Recalibrate?
Monitor backlights drift over time. The white point, brightness, and color balance all shift as the backlight ages. This drift is fastest in the first 200-500 hours of use, then gradually slows. A monitor that was accurate when new will be noticeably inaccurate after 6-12 months of heavy use without recalibration.
| Use Case | Recommended Frequency | Notes |
|---|---|---|
| Professional photo/video | Every 2-4 weeks | Critical color work needs regular verification |
| Content creation (amateur) | Every 2-3 months | Balance accuracy with setup time |
| General productivity | Every 3-6 months | OS calibration wizard is sufficient |
| Gaming | Annually or after hardware changes | Color accuracy less critical than gaming-specific settings |
| New monitor | After 100-200 hours use | Let backlight stabilize before first calibration |
Signs Your Monitor Needs Recalibration
- White backgrounds look noticeably warm (yellow-ish) or cool (blue-ish)
- Skin tones in photos look consistently wrong compared to other screens
- Colors that looked correct on your monitor appear differently when printed or viewed elsewhere
- You can see the difference between your calibrated and uncalibrated settings in a side-by-side comparison on a newer monitor
Frequently Asked Questions
How often should I calibrate my monitor?
For professional color work, calibrate every 2-4 weeks. For general use, every 3-6 months. Monitors drift most quickly in the first 200 hours of use — calibrate after a break-in period, not immediately on first use.
Can I calibrate my monitor without a colorimeter?
Yes. Built-in OS calibration wizards in Windows and macOS can significantly improve accuracy without hardware. Free software like DisplayCAL further extends this. Hardware colorimeters provide measurably more accurate results but are not required for most users.
Does calibration void a monitor warranty?
No. Monitor calibration is a software process that does not affect hardware. Using software to adjust the display or creating ICC profiles does not void any manufacturer warranty.
Should I calibrate with a screen protector installed?
Calibrate without a screen protector if possible — screen protectors can slightly tint the display and interfere with colorimeter measurements. If the protector is permanent, calibrate with it in place since it is now part of your viewing experience.
My calibrated monitor looks dimmer and less saturated than before. Is that normal?
Yes, and it means calibration worked. Most monitors ship over-bright and over-saturated. Accurate calibration targets 80-120 cd/m2 and accurate sRGB saturation — which looks duller than factory presets but reproduces color correctly. Give yourself a few hours to adjust; you will quickly realize the uncalibrated setting was artificially punchy.
Verify Your Calibration
After calibrating, use our free color accuracy test tool to check how accurately your monitor renders color. See also our related monitor guides.